
The Radii Chair
by Former Designer Maker Student Gareth Harding — Now Our Online Tutor!
Gareth joined us in 2017 on our one-year Designer Maker course as a complete beginner. This was Gareth’s second self-designed project during Term 2 of the course, and here’s the making process and journey in Gareth’s own words.
Finding my way into furniture making
In 2017, I made a life-changing decision to enrol on the one-year Designer Maker course at Waters & Acland. At that point, I was a complete beginner to woodworking.
The early weeks of the course were an intense and exciting immersion into the fundamentals of fine furniture making. We covered hand-tool sharpening, board jointing, a breadboard project and a Chinese puzzle, before moving on to more complex work. By the end of the first eight weeks, I’d completed several smaller modules alongside the wall-hanging cabinet – a hand-tool-only project that introduced mitred dovetails, mortice and tenon joints, frame and panel construction, turned handles and veneers. Alongside this ran design tutorials, timber selection, CAD sessions and one-day modules such as French polishing and marquetry.
A machine-based project followed in the form of an occasional table, giving us hands-on experience with all the major workshop machinery. With that completed, I moved on to my first self-designed piece: a table or desk with two piston-fitted drawers. For me, this became the Butcher’s Block.
The course strongly encouraged creativity and exploration, and by the end of the year I’d completed three furniture pieces: the Butcher’s Block, a lounge chair and a media unit. What I’d achieved in twelve months genuinely surprised me. More importantly, I left with the confidence and skill set to begin my own journey as a furniture maker.

The pull of chair making
Like many students and makers, I had a strong desire to make a chair. Chairs are deceptively complex objects: they need to be elegant, comfortable and visually light, yet strong enough to withstand daily use.
My initial idea was a contemporary rocking chair, exploring curves and circular forms. I produced countless sketches, but something never quite settled. At the same time, I was increasingly drawn to classic Danish mid-century modern chairs – their clarity, restraint and quiet confidence. Gradually, the design began to move in that direction, while still holding onto my fascination with curves and circles.
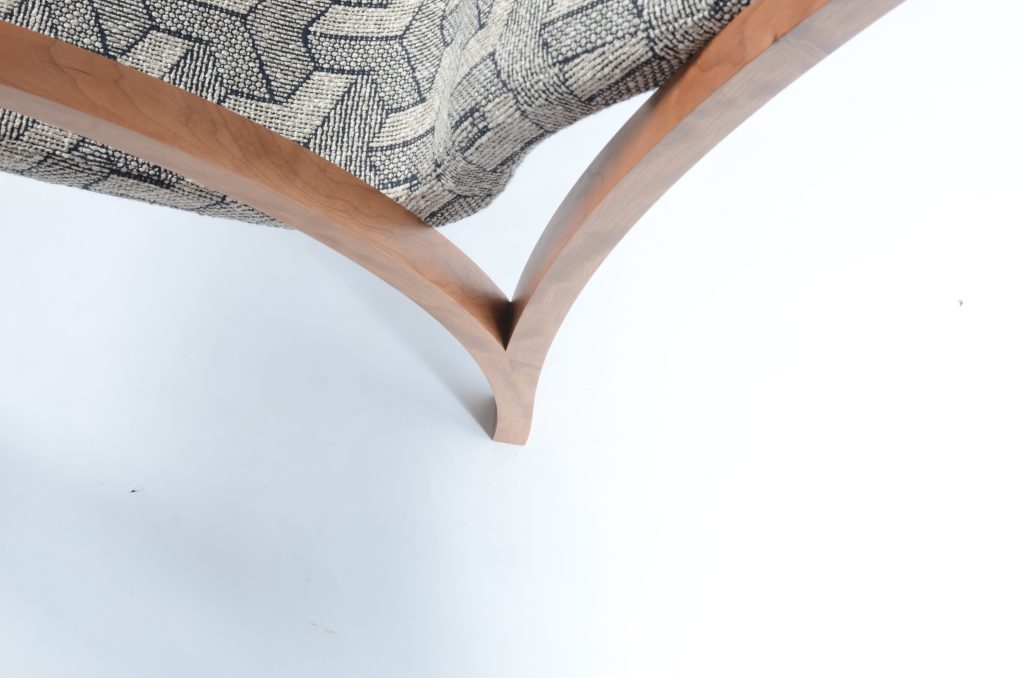
The final design became what I now call the Radii Chair. The frame is deliberately reduced and disciplined: each side of the chair is made from just three components – the front leg, back leg and armrest – all based on only two different radii. The front and back legs share the same curve, echoed again in the armrest. This repetition creates a calm, cohesive profile while keeping the structure efficient and strong.
The chair also features a single-piece seat with integrated lumbar support. I particularly liked how the seat and frame intersect at four points, with those intersections doing double duty as both visual moments and key structural connections.
Timber selection and forming the frame
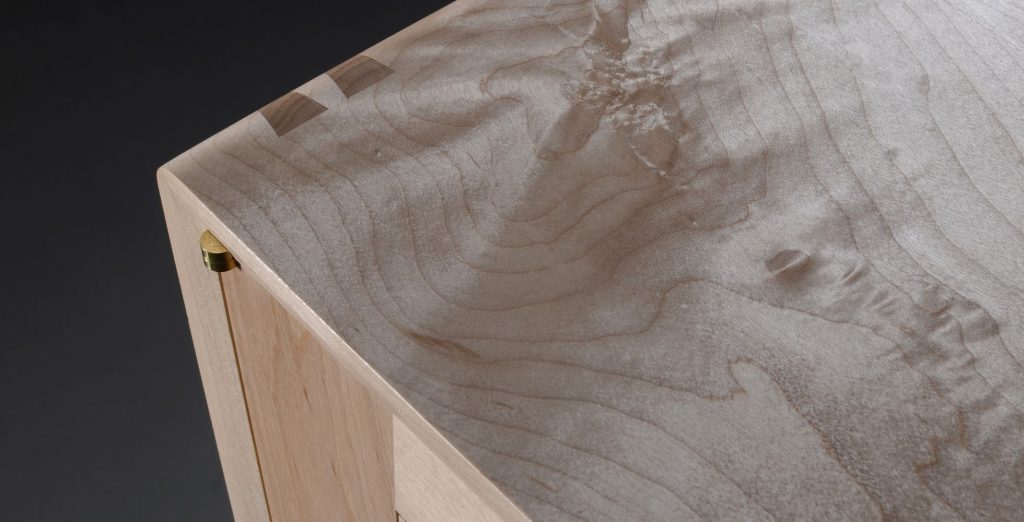
For the frame, we visited Duffield Timber in Ripon, where I selected a beautiful board of cherry. It had warmth, subtle figure and a depth of colour that felt right for the design. The board was processed and ripped into laminates, ready for bending.


To create the curves, I made two dedicated formers: one for the legs and one for the armrests. The laminates were bent and glued over these formers, producing strong, consistent curved components that formed the backbone of the chair.
Before committing to the final cherry frame, I produced a full-size mock-up of one side using tulipwood. This allowed me to test proportions, refine the curves and, crucially, develop and prove the joinery before moving on to the final material.
Developing the joinery
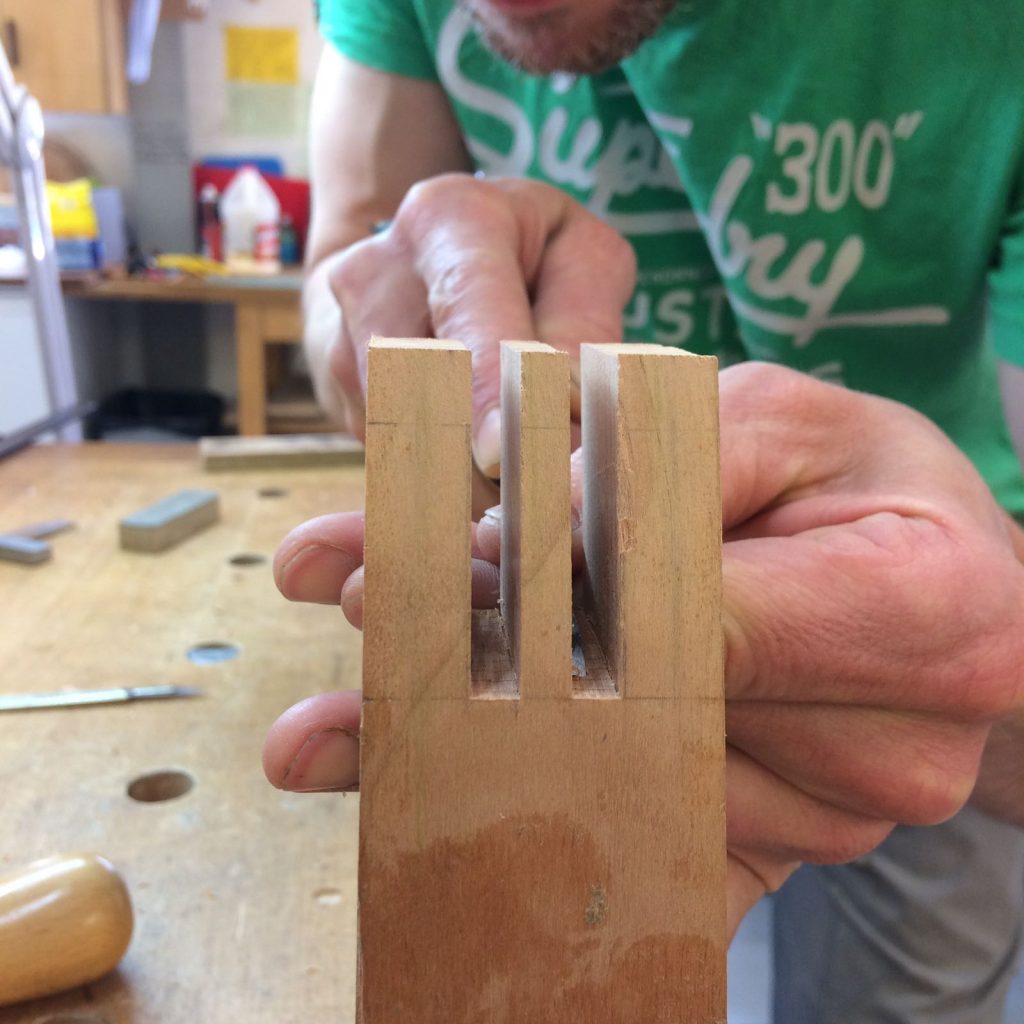
The joint between the front leg and armrest proved particularly challenging. It was made more complex by the fact that two different radii meet at this point. After a day and a half of testing on the spindle moulder – and a great deal of guidance from Graham, one of the course tutors – I arrived at a snug, accurate finger joint. The final step was careful hand-chiselling to remove the scoring marks left by the cutter. No pressure!


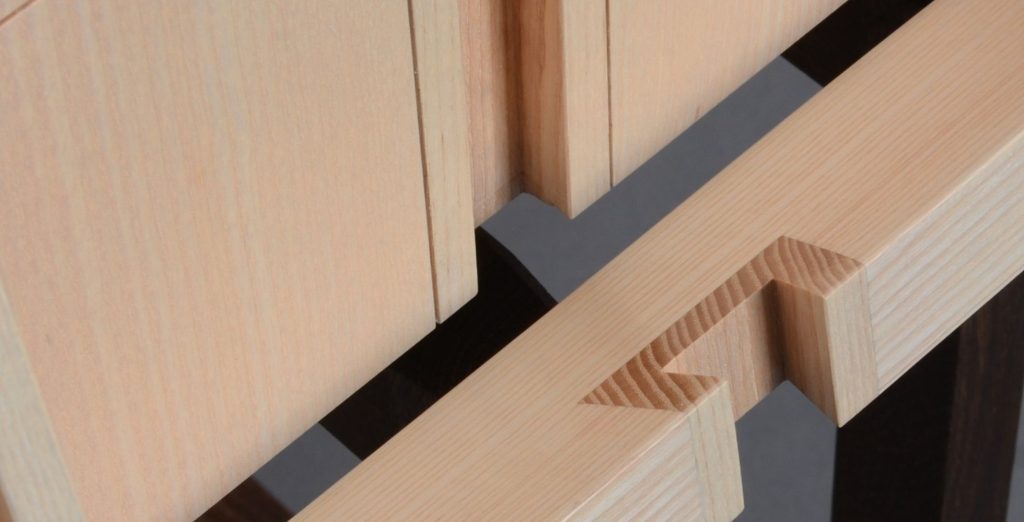
The rear arm-to-leg connection was another critical joint. After talking it through with Will Acland and Graham, we settled on a variation of a gunstock joint as the best solution: strong, elegant and appropriate for the flowing lines of the chair.
As before, I tested the joint in tulipwood first. I made a simple but highly effective jig and routing template. The female part of the joint in the armrest was cut using a bearing-guided straight cutter, producing a clean mortice with a rounded end. The male component was the result of a particularly clever idea from Graham. We created a template by shaping MDF to closely match the mortice, cutting small notches along its edge and filling them with car body filler. This template was then pressed into the taped mortice, creating a perfect negative mould of the joint.


The result was a precisely matched joint with excellent surface contact. Final assembly used a series of staggered-depth Dominoes, carefully positioned to avoid breaking through the narrowest sections – checked, and re-checked, more than once!
The seat: light, strong and sculpted
The seat was made from ten layers of 1.5mm Aeroply, laminated over a second former. The result is a remarkably rigid component that’s just 15mm thick — perfect for maintaining the light visual quality I wanted.


The seat and frame are connected at the four crossover points using 8mm threaded steel rod set in epoxy. This creates an exceptionally rigid structure – surprisingly strong for such a refined design.
Upholstery and final assembly
Before final glue-up, the seat was upholstered in an Escher-style fabric. Choosing the fabric took longer than expected – a process involving myself, my wife, Will Acland and several books of fabric swatches! In the end, I was thrilled with the choice. The upholstery company did a fantastic job of maintaining the slim seat profile while adding just enough softness for comfort.


With the upholstery complete, the chair was assembled and finished. Seeing the Radii Chair fully realised, from initial sketches, through countless tests and jigs, to the final piece, was a hugely rewarding moment.


Looking back
Making the Radii Chair marked a turning point for me on the Designer Maker course. It brought together design thinking, material understanding, complex joinery and collaboration with tutors and fellow makers. More than anything, it reinforced my belief in what’s possible when you commit to learning the craft properly.
That confidence has stayed with me ever since, and the Radii Chair remains a defining piece in my journey as a furniture maker.
Upcoming Courses
We still have a small number of places available on several upcoming courses:
– Introduction to Furniture Making 5-day course starting 2nd February — 2 places left. Next course starting 9th March — 2 places left
– 12-Week Long Course Starting 12th April — very limited places remaining
– Tri Table Making – Laminating & Veneering 5-day course starting 9th February — only 2 places left
– Dovetailed Box Making 10-day course starting 16th March
– 4-Week Furniture Making Course Starting 29th June — spaces available
– Designer Maker Course Our next Designer Maker course starts in September and is nearly full. The course is available in 2- or 3-term options. The 2-term option can be a particularly good fit for international students and may align with a 26-week study visa (subject to current visa requirements).
Short course bookings can be made online. For long course enquiries, please contact Oliver Waters at: school@watersandacland.co.uk
For full details on all courses, visit:


Responses